Mermaid Treasure Charm

The ArtCharms Yahoo! Group has come up with an interesting theme—at least to me.

My first prototype was an attempt to create a vertical cage for a garnet faceted head. I’ll still work on that because the concept is a challenge and would make a pretty charm—but I needed 25 of these so time can become a problem.

mermaid treasure prototype

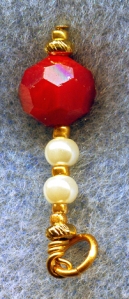
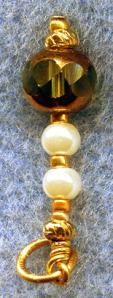
My second idea was to make a scepter. I’ve used a gold-colored headpin, add a gold accent bead, the garnet bead, a gold seed bead, alternated twice with a glass pearl bead and finished with another gold accent bead. On the flat part of the headpin, I thought I’d add a small shell, but changed my mind. When I got there, I changed my mind and used faceted crystals in place of the faceted garnet. It looked more “seaworthy.”

mermaid treasure 1

I think this is something a mermaid might stash in her treasure.

Steampunk–Round Robin Charm

Steampunk is probably my favorite genre. That’s what I chose for my bracelet, so did a couple of others, including Cris. She’s taken some gears and charms, painted a verdigris finish on each component and put them together with jump rings.

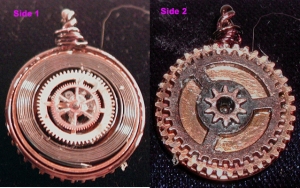
The charm I’ve added is made from an old watch part that includes a coiled spring. On the coiled side, two watch gears were adhered to the center. A Tim Holtz mini gear was adhered to the back. The tricky part of this one was adding a loop for a jump ring. I tried drilling a hole along the watch bezel, but couldn’t get it deep enough into the metal. So I encircled the bezel with a piece of 18 ga. wire, brought it together and twisted it tight, then created a loop and closed it with some 26 ga. wire.

April Steampunk

Beads from Egypt

From Egypt…

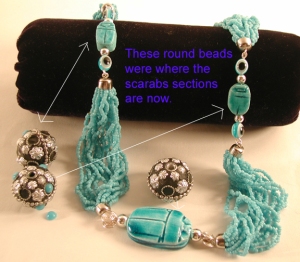
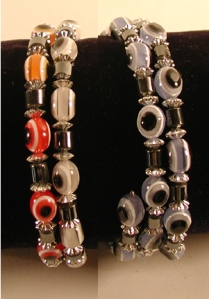
Our friend, Eric, was stationed in Egypt for about a year. He came back with some beads he wanted re-strung/re-designed. Unfortunately, I didn’t think to take a “before” photo, but the round beads in the photo were where the scarabs and beads were in the necklace.

"Before Pix"

Basically, these were six bracelets on thin elastic. I combined 3 gray strands onto a section of memory wire and the white, orange and red beads onto another section of memory wire.

Memory Wire Bracelets

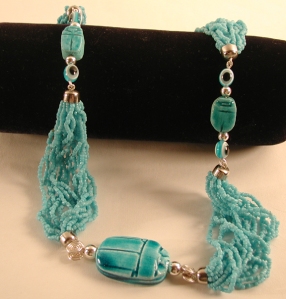
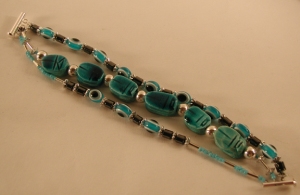
The ceramic scarabs were loose beads and since Eric didn’t seem to like the round beads on the necklace, the large scarab became the focal bead of the necklace. I added round silver beads on each side strung on wire and coiled. A smaller scarab and 2 blue beads from 2 more bracelets were used as accents along the sides. The remaining scarabs were strung using beading wire onto a 3-ring slide clasp. Some of the turquoise seed beads came off of the necklace and were used to make the third strand.

Scarab necklace3-strand bracelet

I’m going to replace the turquoise cabochons on the large beads and cover the holes so that they can be put in a bowl for decoration.

Amethyst—Round Robin Charm—Working Ahead

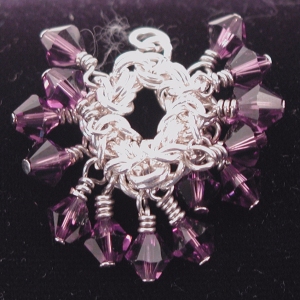
Since I was already working with crystals, I decided to work ahead and make the May Amethyst charm. The pictures posted of this bracelet show it can handle a bit bulkier charm. I chose to use the Byzantine circle from the previous charm, without the 6mm round crystal. The amethyst Swarovski crystals were wired onto headpins, then added to the outer edge of the weave.

When I posted the picture, one of the comments left was that it looked like a regal medallion.

amethyst crystal charm

Crystal Bliss—Round Robin Charm

March brought me the Crystal Bliss charm bracelet. It has such a delicate chain, I wanted to make sure the charm wasn’t too heavy/chunky. My first attempt was a Byzantine chainmaille weave surrounding a 6mm Czech fire-polished crystal. It was okay, but I thought it was too bulky, hefty for the chain—even at only an inch.

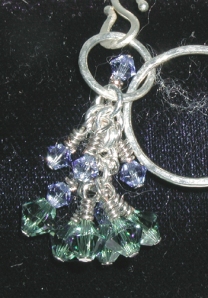
What I chose to do instead was make a layered crystal charm. The lower part of the charm is 6mm green Swarovski crystals and the top layer is 4mm blue Swarovski crystals. It complimented the colors of the charms already on the bracelet.

crystal bliss

Mona Lisa Secrets—Round Robin Charm

This charm theme was tough. The owner chose Mona Lisa Secrets, giving a description of Leonardo da Vinci’s sfumato technique and the prominent colors she’s chosen. This gave us the opportunity to use either Mona Lisa or colors when making a charm.

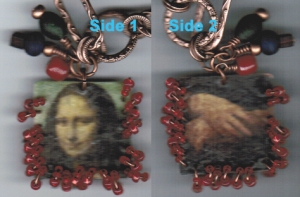
Since I was the second person to add to the charm, I chose to use Mona Lisa herself as the subject. Really…that theme needs the representative inspiration, right? My first thought (and first 3 or 4 attempts) was to use a transfer technique with gel medium and an inkjet print. The first two were printed in reverse and laid on a Vintaj metal blank. Both of were satisfactory, until I got too greedy getting the paper off—took part of the image off, as well. The third was using the skin part of Grafix rub-on paper over a painted surface. One side was painted white with acrylic paint, the other side with a reddish Vintaj patina. When I added the image over the set colors, they were too sheer, no real detail.

So what I settled on was printing on a coffee filter and coating it with Judikins Diamond Glaze. The charm needed a little something else, so I drilled holes along the edge—actually measured! A few dangles and her charm is done.

Mona Lisa charm